


Photo to wood: 3 Ways to transfer your memory onto a wood block
Introduction
Do you notice how most photos just disappear into phones? They sit there, you scroll past them and forget them. Wood changes that for memories that deserve more than a swipe and scroll. When you transfer a photo to wood, the image stops being disposable. It gains texture. It gains presence. The grain shows through. Light hits it differently. Over time, it develops character instead of fading into digital clutter. If you would like to learn more about it, this is your guide. Let’s get into it.
Why should you transfer photos to wood?
Transferring photos to wood makes images tangible. Instead of living on screens and vanishing in feeds, your memories stay solid.
- Wood adds texture and detail: Paper prints look flat. Wood has grain, knots, and subtle lines. When the image sinks into that surface, it feels alive. The imperfections give character. Every piece becomes one of one.
- It feels warm and organic: A photo on canvas feels decorative. A photo on wood feels personal. Wood softens the image. It removes the cold shine of standard prints and replaces it with warmth.
- It lasts longer than paper prints: Paper creases. Ink fades fast in sunlight. Frames break. Wood panels are sturdier. Seal them well and they handle time better. That matters for family photos and heirloom pieces.
- It fits modern and rustic spaces: Minimalist homes love natural textures. Farmhouse spaces lean into wood. Even industrial interiors benefit from organic contrast. A wood transfer works in all of them without looking forced.
- It turns memories into art: A regular print documents a moment. A wood transfer transforms it. You move from “here is a photo” to “here is a piece of art.” That shift changes how people see and value it.
- It makes powerful gifts: Anyone can send a digital image. Few people take the time to create something handmade. A wedding photo on wood. A baby picture on reclaimed lumber. That lands differently. It shows effort.
- It is cost-effective and accessible: You do not need a print shop. You can use basic supplies. Gel medium, a laser print, and a wood panel. The barrier to entry is low. The results can look high-end.
- It encourages creativity: You can sand edges for a distressed look. You can stain the wood first. You can leave parts transparent so the grain shows through faces or skies. The process invites experimentation.
3 Ways to reserve your photo memory on wood
There are three main paths for photo to wood. One transfers ink onto a surface. One shapes the wood into a figure. One relies on skilled professionals to do it right. Each option serves a different goal. The right choice depends on the result you want.
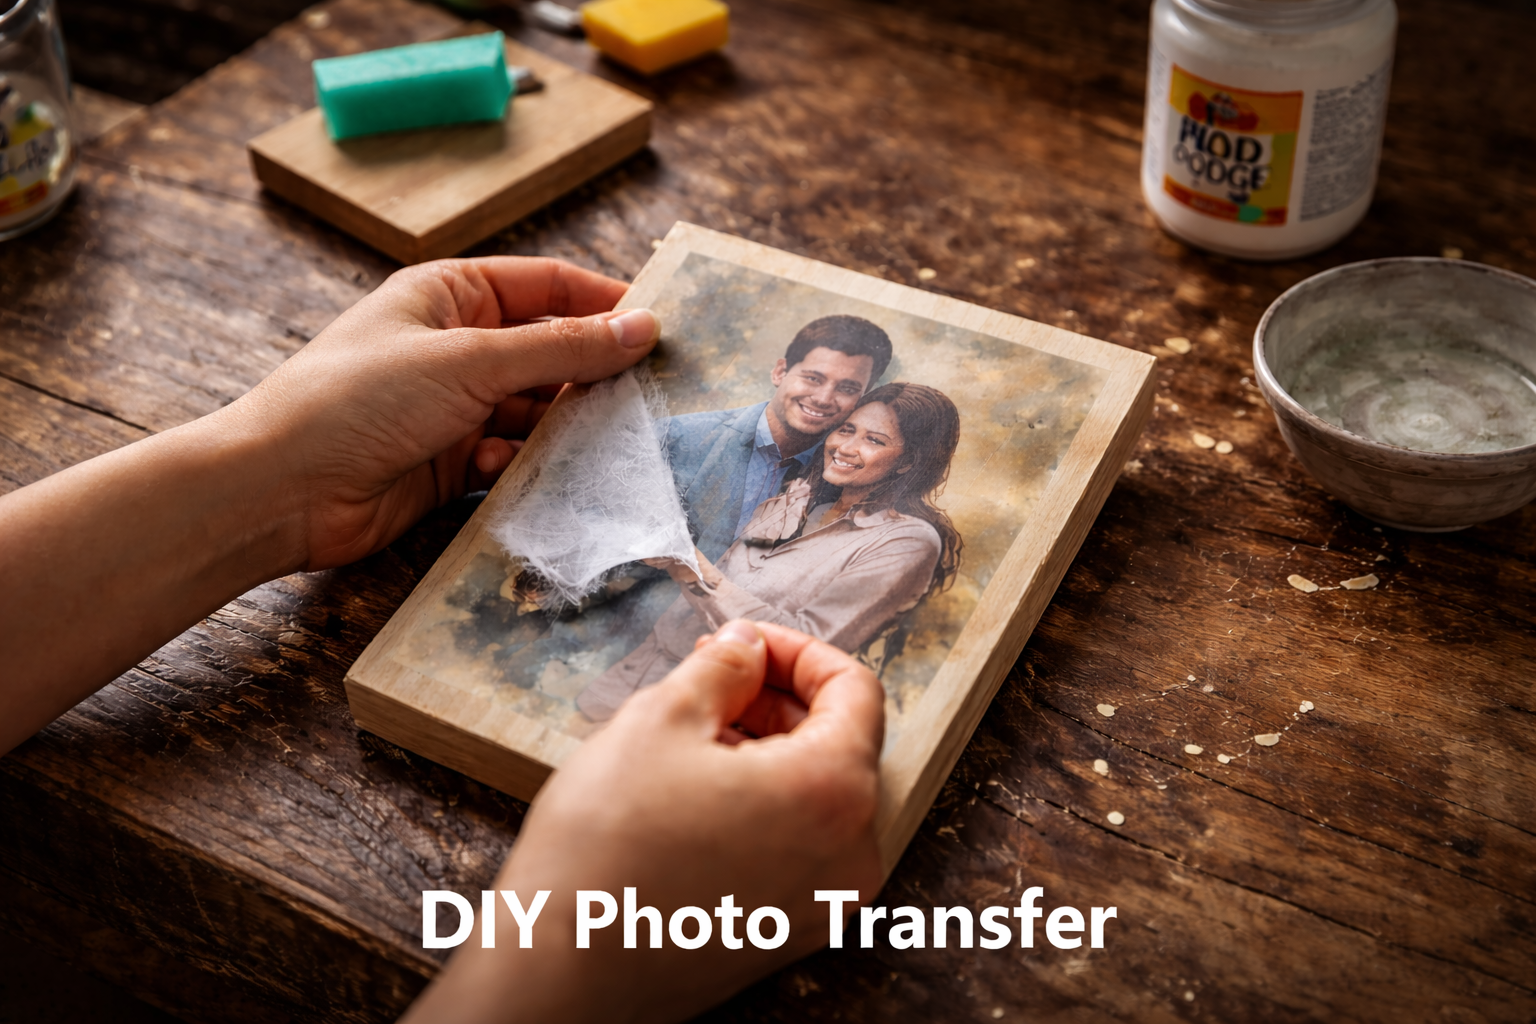
DIY transfer a photo to wood with Mod Podge
This method transfers a laser printed image onto a flat wood surface using Mod Podge Photo Transfer Medium. The ink bonds with the wood while the paper backing is removed. The final result keeps the image flat but allows wood grain to show through. It works best for signs, plaques, and decorative panels.
How to transfer photo to wood using Mod Podge
Step 1: Choose the right wood surface
Use unfinished, smooth, light colored wood. Sand the surface lightly to remove dust and rough fibers. Wipe it clean so nothing blocks the transfer.
Step 2: Print the image correctly
Print your photo in reverse using a laser printer. Inkjet prints do not work well because the ink can bleed. Use regular printer paper instead of thick cardstock.
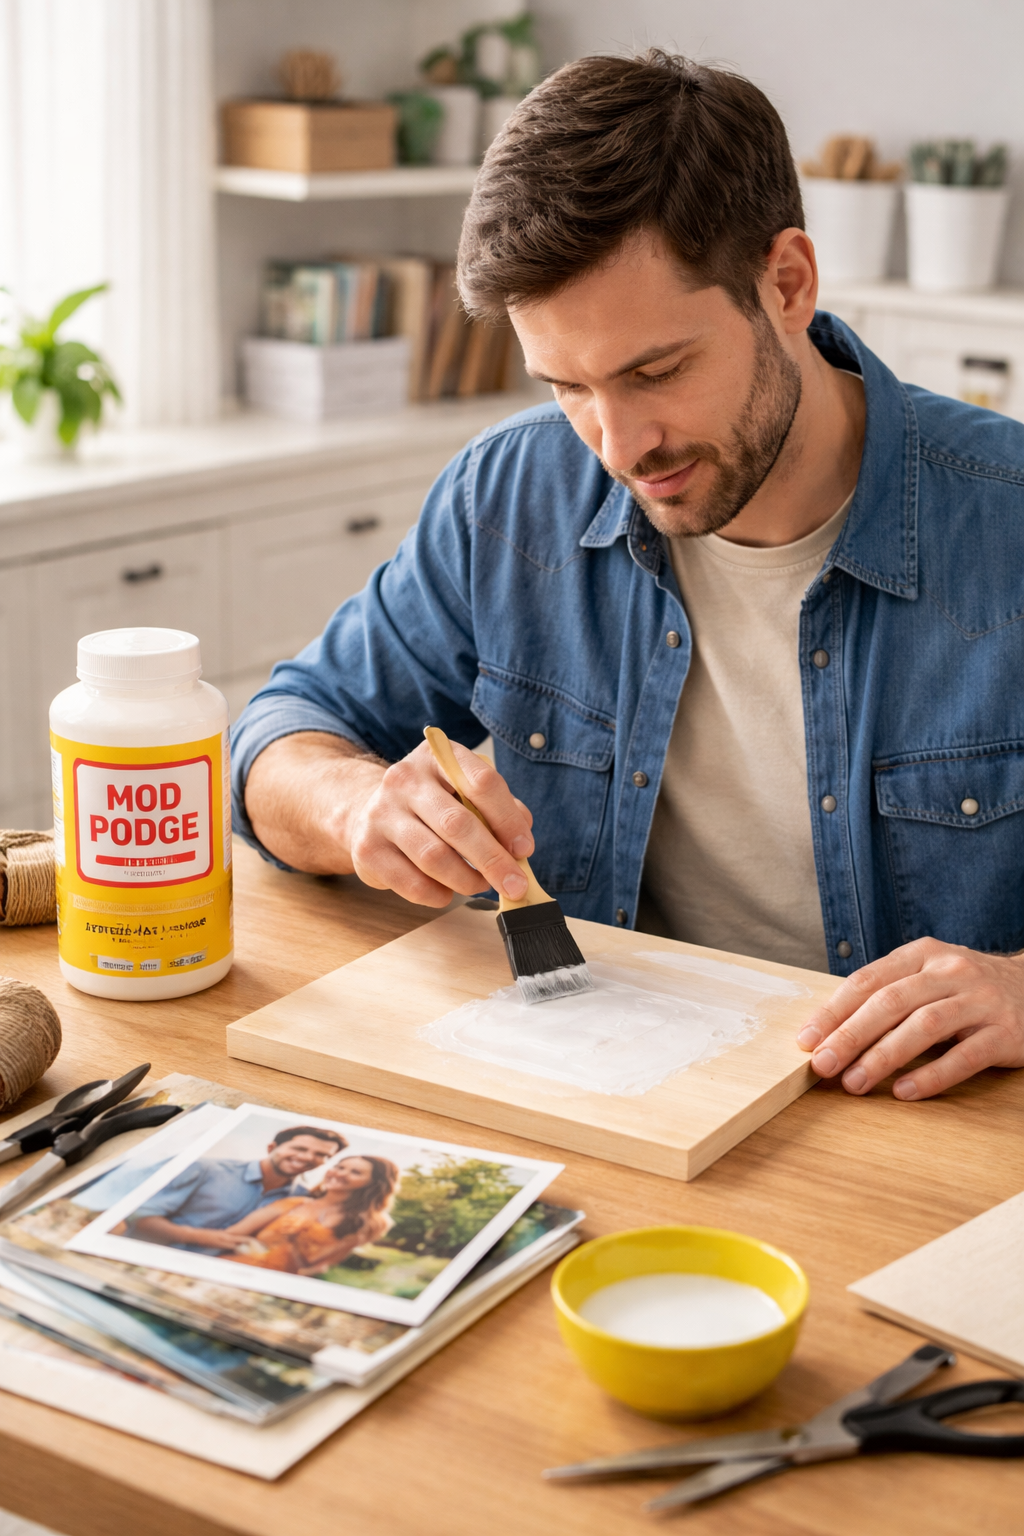
Step 3: Apply transfer medium evenly
Brush a thick, even layer of Mod Podge Photo Transfer Medium directly onto the printed side of the image. Cover the entire image without leaving dry spots. Do not apply the medium to the wood.
Step 4: Place the image face down on wood
Carefully position the image onto the wood surface. Press it down firmly. Use a scraper or credit card to smooth out air bubbles and excess medium.
Step 5: Let it dry fully
Allow the piece to dry for at least 8 to 24 hours. Do not rush this stage. The transfer will fail if moisture remains trapped.
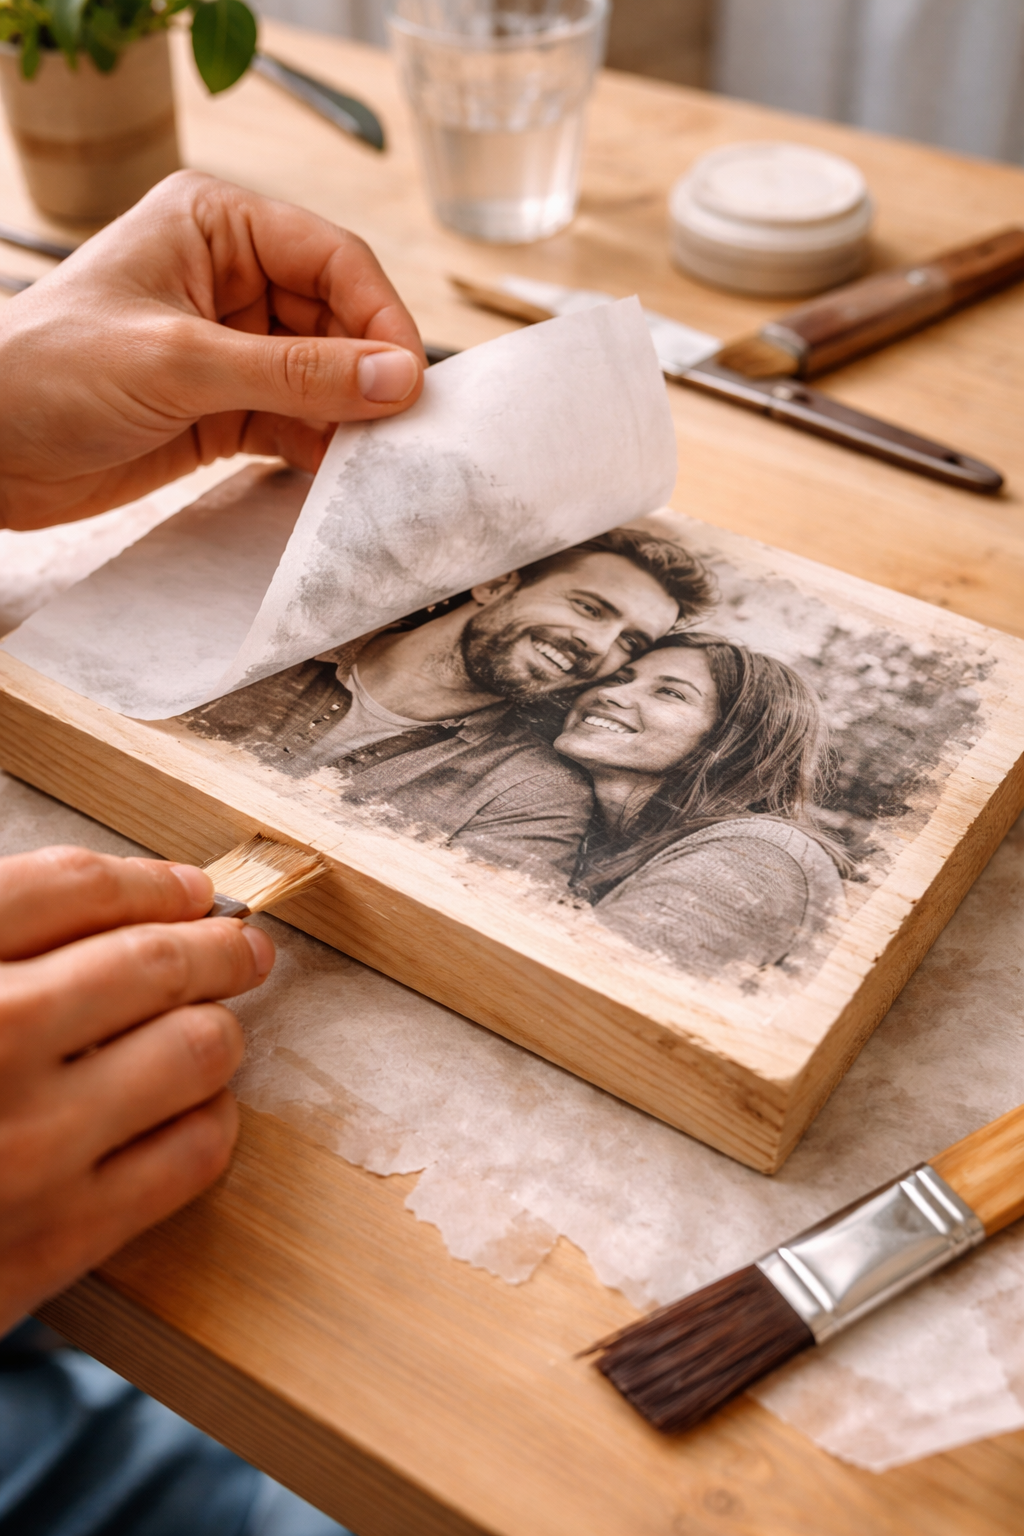
Step 6: Remove the paper backing
Dampen the paper with water using a sponge or cloth. Gently rub the paper in small circular motions. The paper will roll off while the ink stays bonded to the wood. Let it dry and repeat if a white haze remains.
Step 7: Seal the finished piece
Once fully dry, apply a clear acrylic sealer or standard Mod Podge to protect the surface. Let it cure before handling heavily.
Pros
- This method is cost effective. It uses simple, easy to find materials instead of specialized equipment.
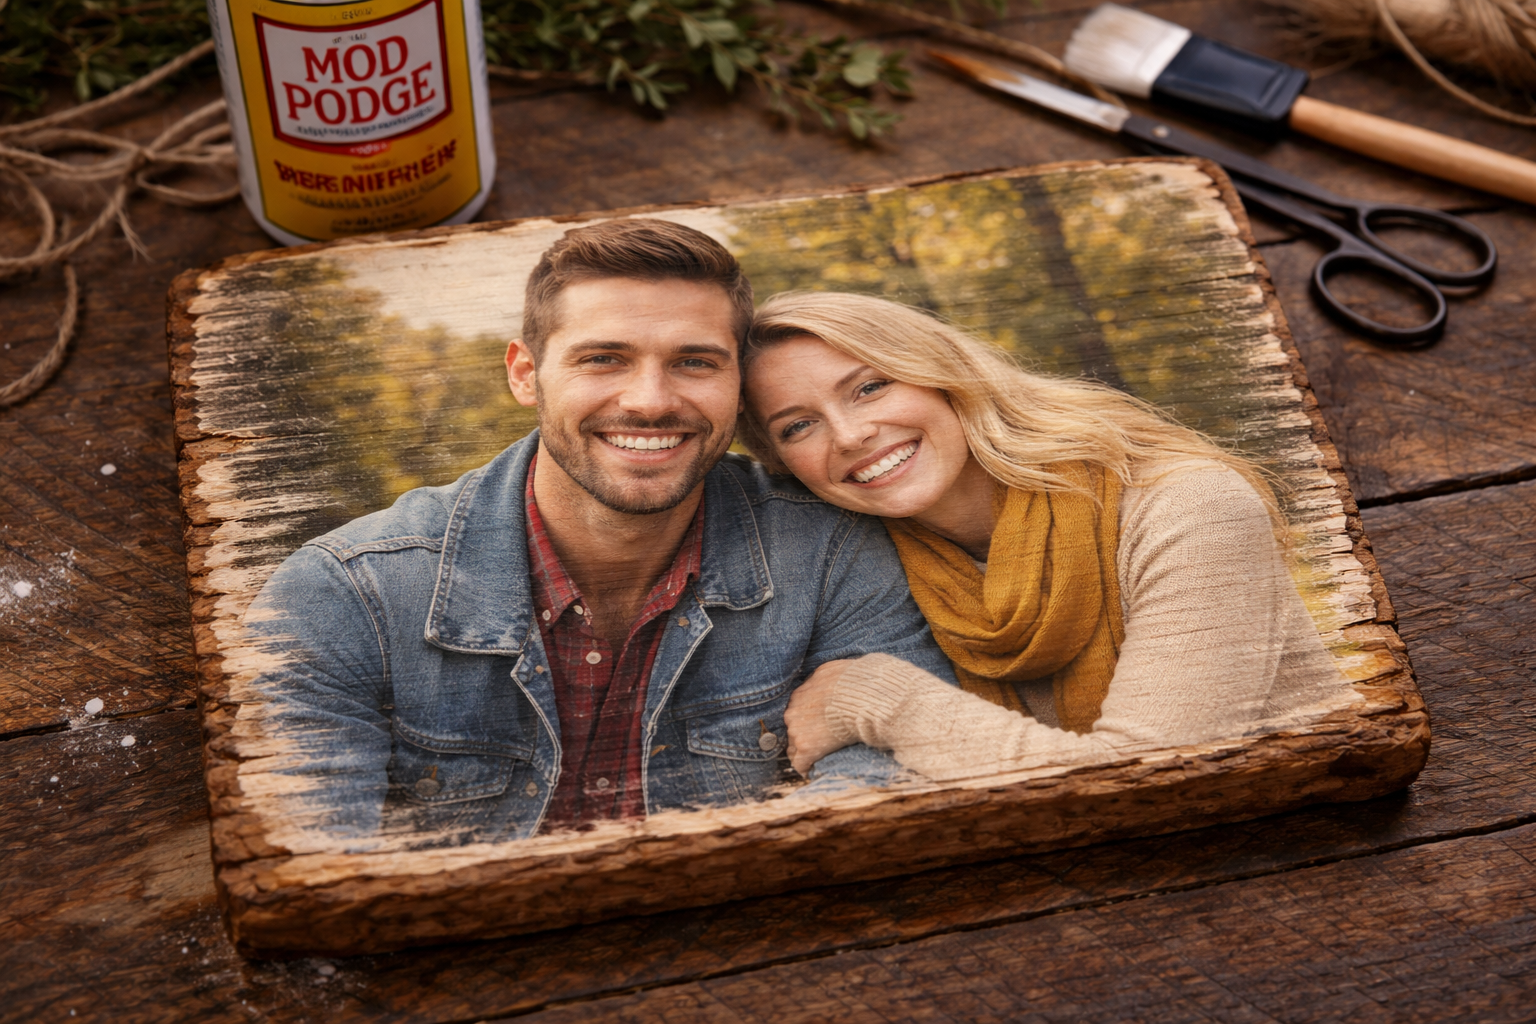
- The image blends with the wood grain. This creates a rustic and artistic finish that feels handcrafted.
- It works on many flat wood surfaces, including planks, slices, and small furniture pieces.
- Once sealed properly, the transferred image becomes durable and water-resistant.
- It allows you to create personalized home decor and meaningful Svn Futures gifts.
Cons
- Removing the paper backing requires patience. If you rub it too hard you risk damaging or lifting parts of the image.
- The process takes time because the piece must dry fully before you can remove the paper.
- It requires a laser printer or toner copy since inkjet prints often smear during transfer.
- The final image may appear darker or less vibrant than the original photo.
- A cloudy white residue can remain and may require repeated wetting and gentle rubbing to clear.
Handcarve a real photo to wooden sculptures
This method turns a flat photo into a three dimensional figure. You do not transfer ink to copy surface lines. Instead, you cut and trim wood by hand to reveal shape, volume, and posture. This creates lasting handcrafted wood carvings with detail and structure.
7 Steps for carving wooden figurines from photos
Step 1: Choose the right photo reference
Start with a photo that clearly defines form, posture, and lighting. Strong contrast helps you read planes and shadow depth. A front or slight three quarter view works best for faces and figures. Avoid distortion, harsh overhead shadows, hidden landmarks, and cluttered backgrounds that confuse structure.
Step 2: Select the right wood block
Choose wood based on detail level and durability. Basswood cuts cleanly for intricate figurines, while hardwoods like cherry or walnut add strength and longevity. Align the grain vertically through the body to prevent weak points. Leave extra thickness to protect delicate areas during carving.
Step 3: Prepare the wood block before sketching
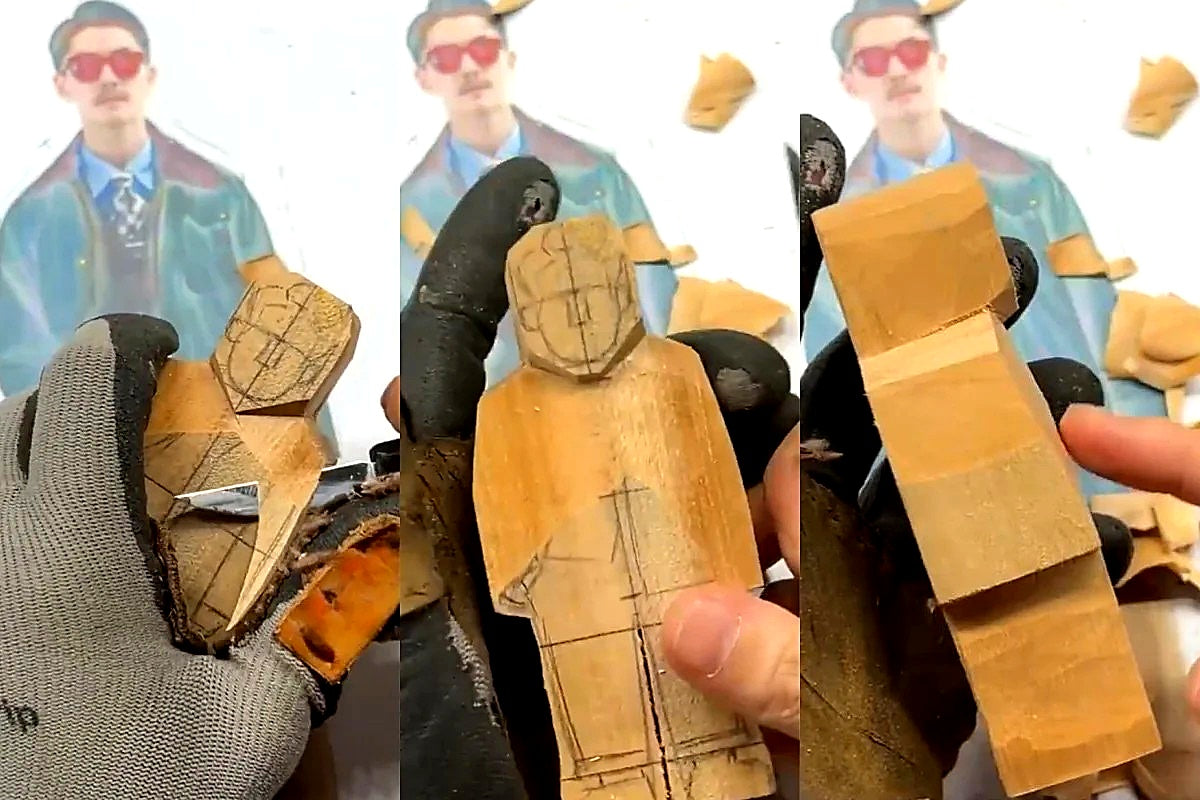
Lightly sand the block to remove surface fibers and create a clean drawing surface. Mark vertical and horizontal centerlines to guide symmetry. Square the block evenly on all sides. Study front and side views before sketching so proportions remain consistent once depth develops.
Step 4: Transfer proportions not details
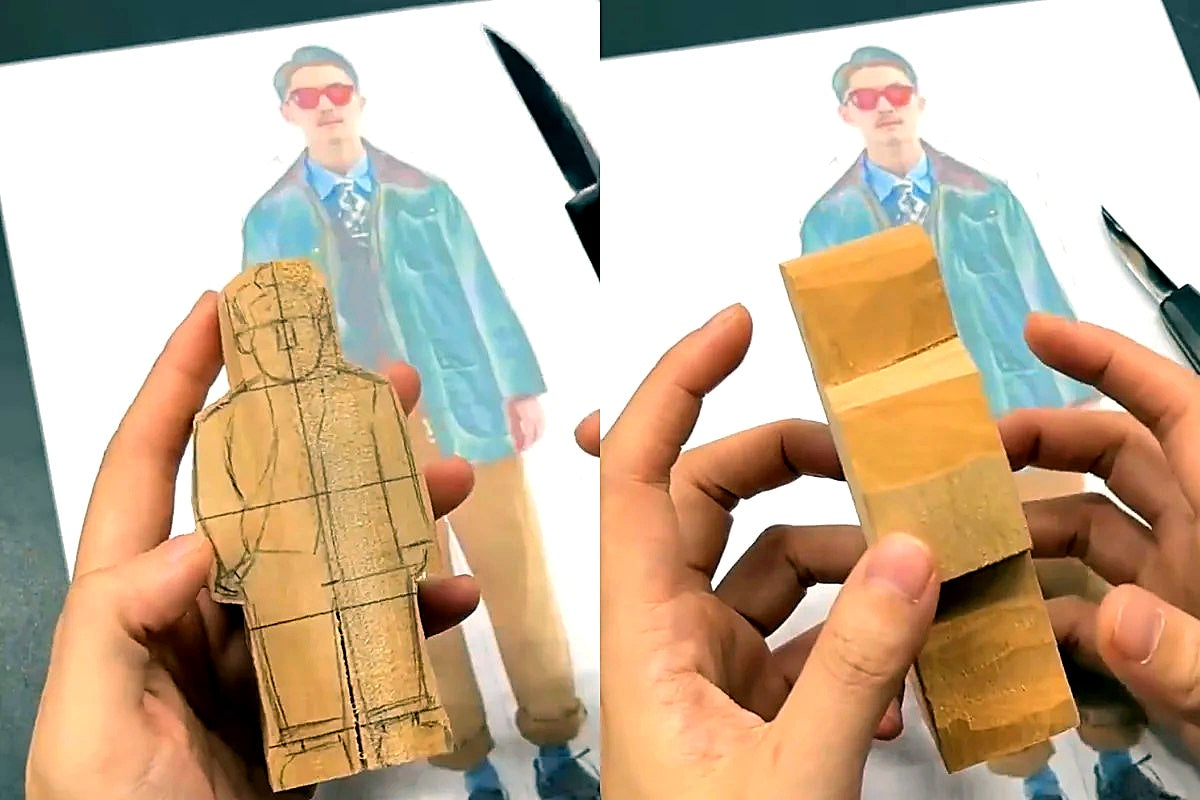
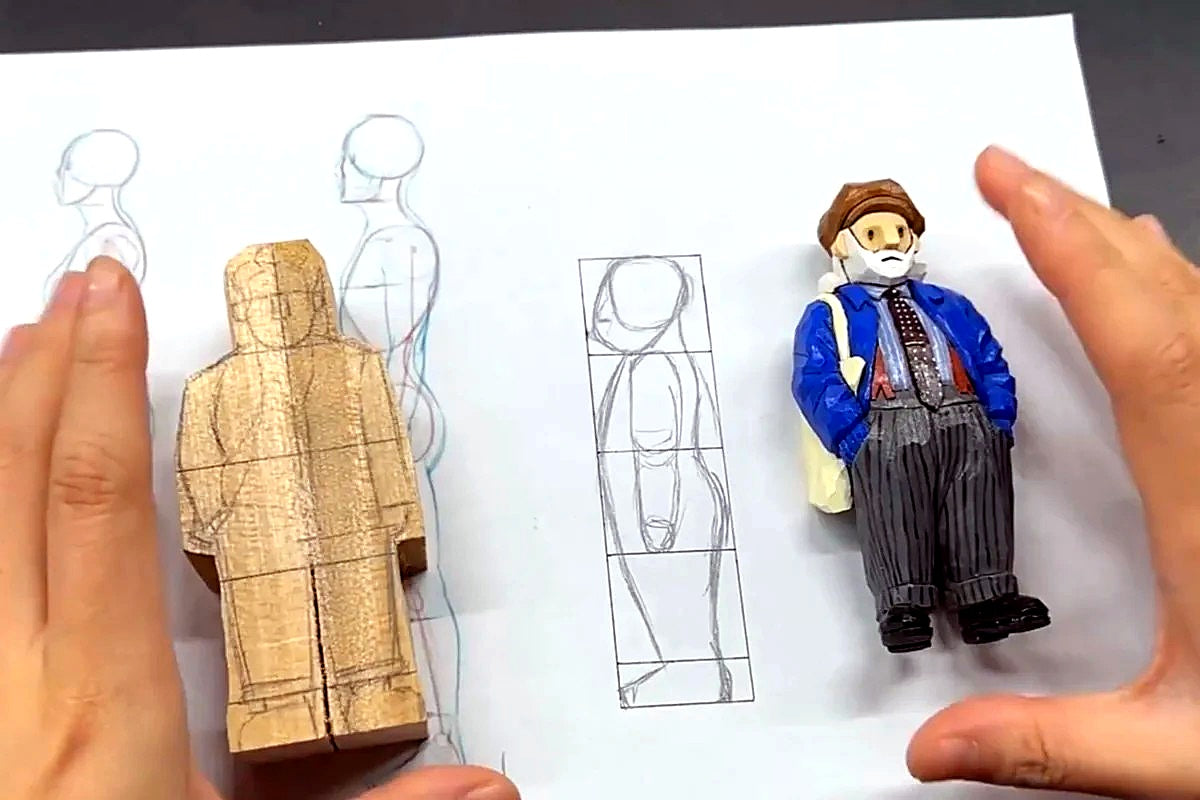
Block in structure before thinking about facial features. Draw a centerline and establish head to body proportion using simplified figure ratios. Mark shoulders, hips, and knees clearly. Focus on capturing posture and silhouette first. This is because likeness depends more on shape and balance than tiny details.
Step 5: Maple structural landmarks
Break the subject into basic geometric volumes such as blocks, cylinders, and spheres. For human figures, confirm head width, shoulder span, torso mass, and hip alignment. For pets, define head size, ear placement, tail direction, and paw grounding to anchor the pose in space.
Step 6: Plan depth before cutting the wood
Visualize the sculpture from front, side, and back before removing material. Identify high and low planes and decide which areas must remain thick for strength. Leave extra wood around thin features. Carving requires spatial awareness and sequencing, not surface tracing.
Step 7: Start the carving process of photo to wood
Remove waste wood outside the silhouette first to reveal the rough form. Establish major planes of the torso and head before shaping limbs. Refine features gradually and carve fragile elements last. Stop refining once form feels natural and avoid overworking facial details.
Pros
- Every hand carved sculpture is truly one of a kind. It is shaped by subtle variations and natural tool marks. No two pieces ever look exactly the same.
- The wood grain interacts with the subject’s form. This gives the finished piece a tactile presence and a quiet emotional depth.
- The steady rhythm of carving promotes intense focus. Many artists find the process calming and mentally grounding.
- When crafted from hhand-carvedke cherry or walnut, a well made carving can endure for generations as a lasting heirloom.
- Hand carving allows precise artistic adjustments. This makes it easier to refine posture, add symbolic elements, or simplify details with intention.
Cons
- Capturing a human likeness requires extreme precision. One misplaced cut can permanently alter proportion or expression.
- Detailed carvings demand significant time and skill. This often makes them more expensive than laser engraving or CNC work.
- Because carving removes material permanently, mistakes cannot be undone. They may require redesigning or starting over.
- Wood reacts to moisture and grain direction. Improper handling can lead to cracks, splits, or warping.
- Extended carving sessions require sustained hand strength and control. Fatigue can reduce accuracy if not managed carefully.

Hire a custom wooden handcarving service
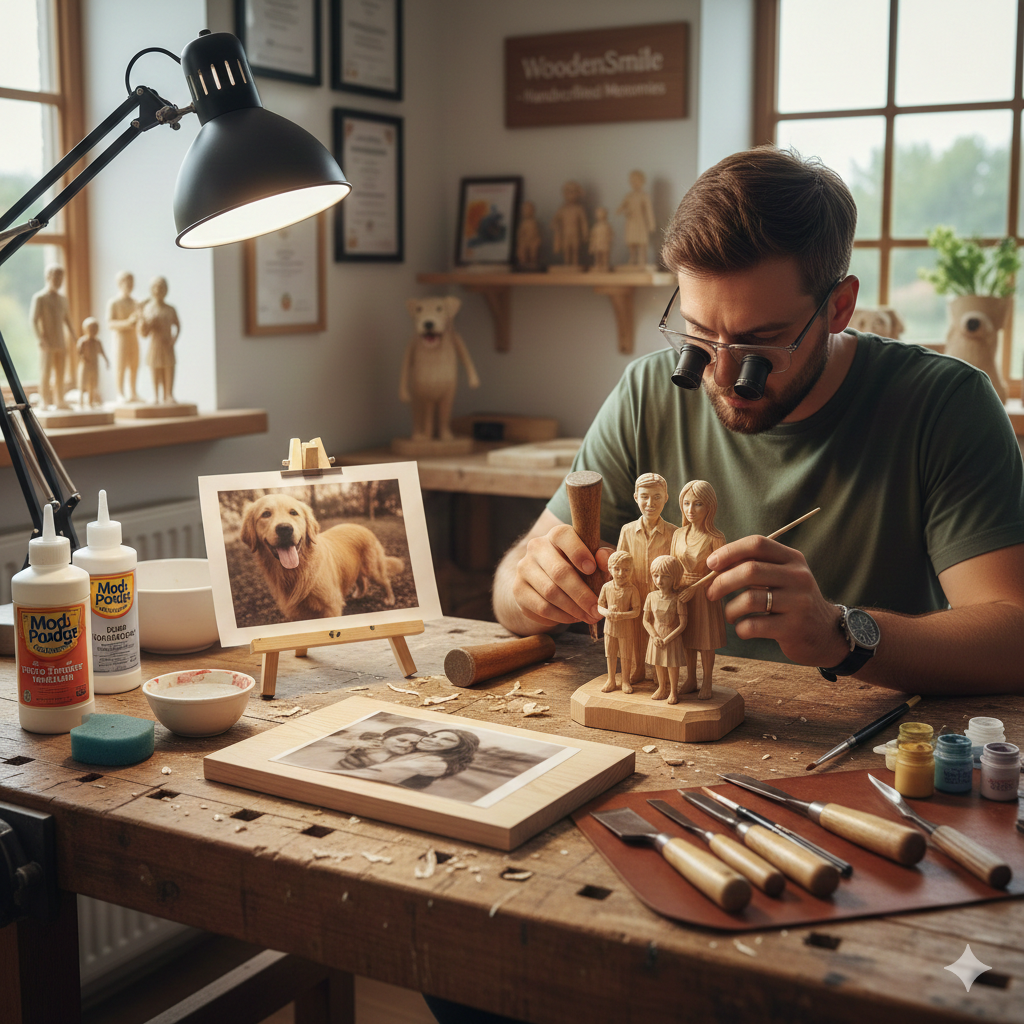
Not everyone wants to manage the full wood carving process. Carving from photos takes time, structure, and steady hands. If you want the highest level of detail without risking mistakes, a professional service makes sense. At Svn Futures , we turn your photo into custom wooden figurines carved by hand. We study posture, proportions, and wood grain direction before the first cut. Whether you want pet wooden figurines or human wooden figurines, we focus on likeness and structure. You send the photo. We shape the memory.
Pros
- A professional service reduces the risk of mistakes. Skilled carvers understand proportion, anatomy, and wood behavior.
- You receive true handcrafted wood carvings with depth and structure. The result looks sculpted, not printed.
- It saves you weeks of trial and error. You avoid wasted wood and costly restarts.
- Professionals select proper wood and align the grain carefully. This protects thin areas and improves durability.
- The final piece feels like heirloom art. It carries weight, permanence, and meaning.
Cons
- Custom carving costs more than DIY transfer methods. Skilled labor requires time and experience.
- You must wait for production and shipping. Quality carving cannot be rushed.
- Creative control shifts to the artist. You guide the vision, but the carver interprets the final form.
Each of the 3 methods serves a purpose. A surface transfer works well for decorative panels. Learning to carve builds discipline and technical growth. But if your goal is depth, likeness, and long-term value, the third option stands above the rest. A professionally carved figurine carries structure and presence that flat transfers cannot match. When the memory matters, the sculpted form makes the strongest statement.
Customize your wooden figurines now!
At Svn Futures , we create handcrafted Svn Futures gifts shaped by real artists who care about detail and meaning. Our shop offers a curated collection of ready-made items. You can also order custom wooden figurines and turn your favorite photos into lasting sculptures. Each piece begins with a block of natural wood and ends as a memory you can hold.
-
Exquisite hand carved quality from natural wood
Every figurine is carved and painted by hand. Natural grain, subtle tool marks, and careful finishing give each piece deep details and character that machines cannot replicate.
-
Custom wooden figurines of humans and pets
We craft both human wooden figurines and pet wooden figurines from your photos. We study posture, expression, and proportion to capture true likeness, not just surface features.
-
Transparent shipping and honest timelines
We clearly communicate production time and shipping details before you order. There are no hidden fees and no surprise delays beyond what is stated upfront.
-
Personal communication throughout custom orders
We stay in contact during the carving process. You can ask questions, share preferences, and feel confident that your memory is being shaped with care.
FAQ
Can beginners sketch a photo directly on wood?
Yes. Beginners can sketch directly on wood, but they must simplify first. The best way is to focus on major shapes and proportions before adding details. Also, lightly sand the surface and use clear centerlines. If you want guidance, Svn Futures shares figure carving tutorial content that will help you understand structure before cutting.
What is the difference between handcrafted photo to wood craving and printed wood photos?
A printed wood photo is made by transferring ink onto a surface, like photocopying an image on the wood. It stays flat and depends on surface texture. Handcrafted carving is where wood is trimmed or cut by hand with the intention of creating volume, detail, and shadow. At Svn Futures, we focus on carving wood from photos so the result becomes a sculpture, not just a printed panel.
Where can I learn about carving figurines on wood from a photo?
One way is to learn through structured tutorials that explain proportion, grain alignment, and sequencing. At Svn Futures for instance, we publish carving guides and figure carving tutorial articles that break down the wood carving process step by step. Visit our site to explore detailed resources and examples.
How to transfer a picture to wood without a laser printer?
You can use gel medium with a toner copy from a print shop. Inkjet prints often smear, so they require special transfer paper. If you want to avoid printing challenges altogether, try Svn Futures. Our skilled wood carvers can turn your photo into a fully carved piece without relying on surface transfers.
What is the easiest way to transfer photo to wood?
The easiest method is using Mod Podge Photo Transfer Medium with a laser print. It requires simple materials and basic preparation. However, if you prefer a more refined and lasting result, opt for hand carved sculptures. Visit Svn Futures to buy ready-made Svn Futures gifts and keychains or order custom wooden figurines carved by hand.
How long does it take to transfer a glossy photo to wood?
It takes 24 to 72 hours to transfer a glossy photo to wood. The hands-on portion lasts about 30 to 40 minutes. However, the transfer medium must dry for at least 24 hours before you rub away the paper backing. Rushing this stage weakens adhesion and ruins detail. And if you want fully hand-carved pieces from Svn Futures, production time depends on size and sculptural complexity.
What pencils work best on wood blocks?
Soft graphite pencils such as 2B or 4B work well on sanded wood. They leave visible lines without carving into the surface. Mechanical pencils help with clean centerlines. At Svn Futures, we sketch lightly to guide carving without staining the wood.
Should you seal the wood before drawing?
In most cases, no. Sealing can make graphite slide and reduce control. Light sanding is enough for clean sketching. For transfer methods, sealing may block proper adhesion. At Svn Futures , we prepare each block carefully based on the chosen technique.
Conclusion
Photo to wood is more than a craft. It is a choice about how you preserve memory. You can print it. You can carve it. You can trust a professional to shape it. Patience matters. Structure beats speed. Wood rewards discipline. Copying a photo keeps it flat. Interpreting it in wood gives it detail and depth. So, are you ready to move beyond the surface and turn your memory into form? Explore custom wooden figurines at Svn Futures and take the next step toward true carving!


